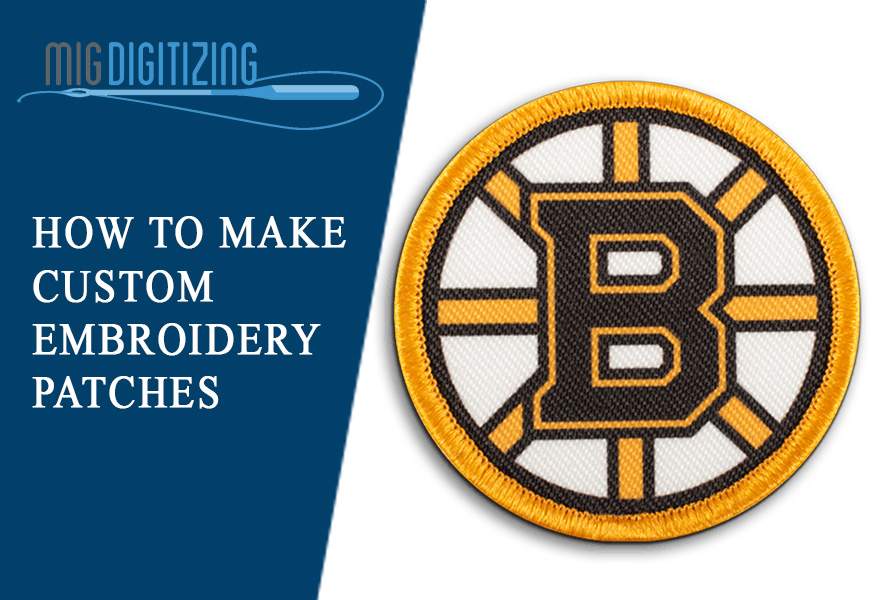
Custom embroidery patches are a practical way to showcase a business logo, represent a team, personalize clothing, or create branded merchandise. From company uniforms and sports apparel to denim jackets, backpacks, hats, and promotional products, embroidered patches combine colorful thread with a textured, professional appearance.
Whether you are a business owner ordering branded patches, an artist turning original artwork into embroidery, or a hobbyist learning to make patches at home, understanding the production process can help you achieve better results. The right design, fabric, stitch settings, border, and backing all influence the finished product.
Making a high-quality patch involves more than stitching a picture onto fabric. You must prepare suitable artwork, convert it into a machine-readable embroidery file, select appropriate materials, stitch the design, finish the edges, and choose a backing that suits its intended use.
In this guide, we will explain how to make custom embroidery patches, explore the available customization options, and share practical tips for creating durable, attractive designs.
Custom embroidery patches are fabric emblems decorated with stitched thread to reproduce a logo, name, symbol, illustration, or other design. Unlike printed patches, embroidered patches create their appearance through individual stitches, producing a raised texture and a distinctive finish.
A typical embroidered patch consists of four main elements:
Base fabric: Twill or another suitable material that supports the embroidery.
Embroidery thread: Colored thread used to reproduce the artwork.
Border: A finished edge that defines the patch shape and helps prevent fraying.
Backing: The material or attachment system used to secure the patch to clothing or another surface.
These elements can be customized to suit different applications. Businesses may use embroidered logo patches on uniforms, while clubs and sports teams may choose custom badges for jackets, bags, and team apparel. Individuals can also create personalized patches for fashion projects, gifts, and crafts.
The process varies depending on the equipment, design complexity, and production method. However, the following steps provide a useful starting point for making embroidered patches at home or preparing a professional production order.
Begin with a clear design that communicates your intended message. You can create a new illustration, prepare a company logo, or adapt existing artwork into a patch design.
Vector artwork is useful because it can be resized without losing its basic shape and edge definition. High-resolution PNG or JPG files may also work well as references when the original vector file is unavailable.
Before finalizing your artwork, consider the patch's dimensions and intended use. A small patch for a cap has different requirements from a large jacket-back emblem.
Keep these design principles in mind:
Use clear shapes and recognizable symbols.
Choose colors that contrast with one another.
Avoid excessive fine lines and tiny lettering.
Allow enough space between individual design elements.
Make sure the artwork remains readable at the finished size.
For example, a detailed illustration may look impressive on a computer screen but become difficult to reproduce when reduced to a two-inch patch. Simplifying small details can improve stitch clarity and overall appearance.
Embroidery digitizing is one of the most important stages in making custom embroidered patches. It converts artwork into a machine-readable embroidery file containing instructions for stitch placement, direction, density, sequencing, and thread changes.
A standard image file is not an embroidery machine file. The artwork must be interpreted and programmed into stitches before an embroidery machine can reproduce it correctly.
During patch digitizing, the design is prepared with the patch's construction and finished size in mind. A digitizer selects suitable stitch types, determines the stitching order, adjusts density, and plans the border.
For example, fill stitches can cover larger areas, satin stitches can create lettering and narrow outlines, and running stitches can reproduce fine lines. The appropriate choice depends on the size, shape, fabric, and visual requirements of the design.
Patch digitizing also requires attention to edge finishing. The stitch plan should support the selected border and help create a clean, consistent outline.
If you are producing patches for customers or commercial orders, professional embroidery digitizing services can help turn artwork into a production-ready file. Migdigitizing offers embroidery digitizing services for businesses and individuals who need artwork prepared for machine embroidery.
The base material affects the patch's texture, durability, and appearance. Twill is a common choice because it provides a stable surface for stitching and works well for many traditional embroidered patches.
Other materials may suit particular styles or applications, but they should be compatible with the intended stitching method.
A stabilizer supports the fabric during embroidery and helps reduce shifting, stretching, and puckering. The appropriate stabilizer depends on the material, design density, and production setup.
Before stitching, make sure the fabric is smooth and properly secured. Loose fabric can move during embroidery, causing misalignment or uneven stitching.
For larger production runs, maintaining consistent materials and preparation methods helps ensure that patches look similar from one piece to the next.
Thread colors help determine how clearly the design stands out. Choose shades that complement the artwork while maintaining sufficient contrast between the background, lettering, outlines, and decorative elements.
For example, a dark blue logo may become difficult to read on a black background. Adding a lighter outline or selecting a contrasting base fabric can improve visibility.
Stitch types also influence the final result:
Satin stitches: Suitable for lettering, borders, and narrow shapes that benefit from a smooth, raised appearance.
Fill stitches: Useful for covering larger areas with thread.
Running stitches: Appropriate for fine outlines and certain lightweight details.
Not every part of a design should use the same stitch type. A thoughtful combination creates texture while balancing coverage, readability, and production efficiency.
The goal is to reproduce the essential appearance of the artwork without making the patch unnecessarily dense or stiff.
Once the design file and materials are ready, load the embroidery file into a compatible machine and prepare the thread colors.
Secure the fabric and stabilizer according to the chosen production method. Check that the materials are flat and that the design is positioned correctly before starting.
During stitching, monitor thread tension, color changes, and material movement. Loose threads, skipped stitches, and fabric puckering should be addressed before they affect the finished batch.
If you are making patches at home, begin with a test sample rather than immediately producing several finished pieces. A test run helps identify problems with sizing, density, lettering, and border placement.
Commercial production generally follows the same basic principles, with additional attention to repeatability and consistent results across larger quantities.
After the embroidery is complete, remove the patch carefully and trim excess fabric and stabilizer as required by the construction method.
The edge must be finished appropriately to prevent fraying and give the patch a neat outline.
Two common border options are merrowed borders and die-cut shapes with finished edges. A satin stitch border may also be used for suitable designs, especially when a custom outline is required.
Choose the border according to the design's shape, complexity, and intended appearance. Clean trimming is essential because uneven edges can make an otherwise well-stitched patch look unprofessional.
The final construction stage is selecting and attaching the appropriate backing. The best option depends on whether the patch should be permanently attached, removable, or temporarily positioned.
After the backing is applied, inspect the patch for loose threads, uneven edges, missing stitches, and alignment problems. A final quality check helps ensure that the patch is ready for use or delivery.
Embroidery coverage describes how much of the patch's visible surface is covered by stitched thread. It influences the texture, background visibility, appearance, and production requirements.
With partial coverage, some of the base fabric remains visible between or around the embroidered elements. This approach works well for designs that use the fabric as an intentional background color.
For example, a company logo featuring lettering and a simple symbol may not require every part of the patch to be covered with thread. Leaving the background visible can create a clean appearance while reducing unnecessary stitching.
Full coverage is useful when the design requires a more completely embroidered surface. It may suit bold graphics, detailed emblems, and artwork where a solid thread background is part of the intended look.
However, more coverage does not automatically mean better quality. Excessive stitch density can increase stiffness, production time, and the risk of puckering.
The right coverage depends on the artwork, patch size, base material, and desired finish. Discussing these factors before production can help you choose a suitable construction method.
Borders help define the patch shape, protect the edge, and create a finished appearance. Two common choices are merrowed and die-cut borders.
A merrowed border uses an overlock-style finish that wraps around the patch edge. It creates a thick, raised outline and is commonly associated with traditional embroidered badges.
This option works especially well for simple shapes, including circles, ovals, rectangles, and other designs with suitable outer edges.
Die-cut patches are cut to follow a custom outline rather than relying on a conventional rounded shape. This approach works well for irregular logos, distinctive silhouettes, and more complex artwork.
A suitable finishing method must still be selected to protect the exposed edge. The final construction depends on the material and manufacturing process.
| Feature | Merrowed Border | Die-Cut Shape |
|---|---|---|
| Appearance | Thick, wrapped edge | Custom outline |
| Suitable designs | Simple, regular shapes | Irregular or complex shapes |
| Design flexibility | Best for compatible outlines | Greater shape flexibility |
| Main consideration | Border must suit the shape | Requires careful edge finishing |
Neither option is universally better. Choose the one that complements your artwork and intended patch style.
Backing determines how a patch attaches to a garment, bag, uniform, or other item. Consider how often the patch will be used, whether it needs to be removed, and what type of material it will be attached to.
Sew-on patches are attached with stitching. They are a versatile choice for jackets, uniforms, backpacks, and other items where a durable attachment is preferred.
They do not depend on heat-activated adhesive, making them useful when the garment's material or construction is unsuitable for iron-on application.
Iron-on patches use heat-activated adhesive to attach to compatible fabrics. They can be convenient for personal projects and merchandise that needs straightforward application.
Always follow the backing manufacturer's instructions and check the garment's heat tolerance. Some fabrics require a different attachment method, and iron-on backing may need additional stitching for demanding or frequently washed applications.
Hook-and-loop backing allows patches to be removed and replaced. It is useful for uniforms, equipment bags, and products where the displayed patch may change.
One side is typically attached to the patch, while the corresponding side is secured to the garment or equipment.
Adhesive backing is useful when a temporary attachment is needed. Its durability depends on the adhesive and the surface being used.
It may not be the best choice for garments exposed to repeated washing or heavy wear.
Pin backing can be suitable for badges and decorative accessories, while magnetic backing may work for selected promotional or display applications.
These options are less appropriate for every garment, so consider the patch's weight, intended location, and attachment requirements before choosing them.
A strong patch design combines attractive artwork with practical embroidery requirements. These tips can help improve both appearance and production quality.
High contrast makes lettering, symbols, and outlines easier to recognize. Combinations such as black and yellow or dark blue and white can work well when they complement the brand or artwork.
Bright colors can also be effective, but they should serve a clear purpose rather than overwhelm the design.
A patch has limited space for detail. Very small lettering, narrow gaps, and intricate illustrations may become difficult to reproduce clearly with thread.
Simplify elements that do not contribute significantly to recognition. Prioritize the main symbol, name, or message.
A border should frame the design without competing with it. Matching the border to a prominent color in the artwork can create a coordinated appearance, while a contrasting border can make the overall shape stand out.
A patch intended for a cap may require different dimensions and design adjustments from a large back patch for a jacket. Think about viewing distance, available space, garment material, and attachment method before finalizing the artwork.
A sample stitch-out can reveal issues that are not obvious in a digital preview. Check lettering, color contrast, stitch coverage, fabric movement, and border quality before approving a large order.
Testing can help prevent wasted materials and reduce the need for extensive corrections.
Even attractive artwork can produce disappointing results when important production details are overlooked.
Using artwork that is too detailed: Tiny features may not reproduce clearly. Simplify the artwork or increase the patch size where practical.
Skipping embroidery digitizing adjustments: A regular image cannot simply be sent to an embroidery machine. The stitch file must be prepared for the design's dimensions, materials, and border.
Choosing unsuitable backing: An attachment method that works for one garment may not work for another. Consider fabric compatibility, washing, wear, and removability.
Ignoring stitch density: Too few stitches can leave unwanted gaps, while excessive density can create stiffness and puckering.
Selecting the wrong border: The border should match the patch shape and protect the cut edge. A poorly planned border can compromise the appearance of the entire design.
Failing to inspect the finished patch: Check for loose threads, uneven trimming, missed stitches, incorrect colors, and insecure backing before using or shipping the product.
Making patches at home can be a rewarding option for hobbyists and small projects. However, professional digitizing can be particularly helpful when you need consistent results, complex logo reproduction, small lettering, or files prepared for commercial production.
A professional digitizer evaluates the artwork and adapts it to the embroidery process. This may involve selecting stitch types, adjusting density, planning the sewing order, refining outlines, and preparing the file for the intended patch construction.
Migdigitizing provides embroidery digitizing services for businesses, designers, and individuals who need artwork converted into machine-ready embroidery files. Whether you are preparing a company logo, a team emblem, or a custom patch design, the objective is to create a file suited to the intended production requirements.
If you already have artwork, prepare the design, intended patch dimensions, preferred border, and any machine or file-format requirements before requesting digitizing. Providing these details helps the digitizer understand the project and prepare an appropriate solution.
Prepare your artwork, digitize it into a machine-readable embroidery file, select the base fabric and stabilizer, stitch the design, trim and finish the edges, and apply the chosen backing. Inspect the finished patch before use.
Typical supplies include suitable base fabric, embroidery thread, stabilizer, an embroidery machine, a compatible stitch file, trimming tools, and the materials required for your chosen edge finish and backing.
Yes, hand embroidery can be used to create decorative patches, although it requires a different workflow and may be slower for repeated designs. Machine embroidery is generally more suitable when consistent reproduction or larger quantities are needed.
Twill is a popular choice because it provides a stable base for many patch designs. Other materials may work for particular styles, but the best choice depends on the stitching method, desired appearance, and intended application.
Sew-on backing is versatile for durable attachment, iron-on backing is convenient for compatible fabrics, and hook-and-loop backing is useful when patches need to be removable. The right option depends on how the patch will be used.
Digitizing translates artwork into stitch instructions that an embroidery machine can follow. Proper digitizing helps control stitch direction, density, sequencing, lettering, and border construction, all of which affect the finished patch.
Not necessarily. Full embroidery provides greater thread coverage, while partial embroidery allows the base fabric to remain visible. The best option depends on the artwork, design goals, production requirements, and desired texture.
Clear artwork, suitable stitch density, consistent thread coverage, clean edges, a well-matched border, and appropriate backing all contribute to a professional result. A test stitch-out and final quality inspection can help identify problems before delivery.
Custom embroidery patches offer a flexible way to display logos, artwork, names, and designs on clothing and accessories. By planning the artwork, selecting suitable materials, choosing the right coverage and border, and using an appropriate backing, you can create patches that look attractive and suit their intended purpose.
For the best results, treat digitizing as an essential part of the process rather than an afterthought. A properly prepared embroidery file helps the machine reproduce the design according to the requirements of the finished patch.
Oct 09 , 2026 at 14:43:28
Sep 28 , 2023 at 09:05:43
Sep 28 , 2023 at 09:06:57