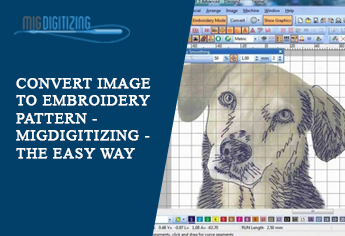
Do you want to learn how to convert an image to an embroidery pattern in the easiest way possible? Then take a pause. You have come to the right place. Today, we will discuss how you can convert an image to an embroidery file.
It is the hard work of an embroidery digitizer who made it look easy to convert an image to embroidery. But do not fret. We will tell you how you can do it. Let’s get started.
What Is A DST File?
A DST file is an embroidery file format and is launched by Tajima. It stores the embroidery instructions that are necessary for an embroidery machine. These instructions tell the embroidery machine what to do. DST files are created by an embroidery digitizer. A DST file format is now used by many machines.
The Process of Image File Manipulation
We are using Wilcom embroidery software for this guide.
Open Your Artwork In The Software
The first step is to open the image in the Wilcom embroidery software. This will help you to edit your image.
-
Go to the menu at the top and select insert image file. Keep in mind to select all file options when choosing the image.
-
Choose the image and start digitizing it for your embroidery work.
-
You can convert the image into DST file format or any other embroidery file format.
Take Measurements Of The Object
It is very crucial to take measurements of your image/object before you start to digitize your embroidery work. This will help you to analyze the object and stitch it appropriately.
Another reason for measuring the object is that different stitches have different stitch lengths. Press ‘m’ to measure the object till the endpoint. A pop will show you the actual image size of the object.
Crop The Image Accordingly
It is always a smart step to crop the image and set your desired size early on in the digitizing process.
-
Go to your image in the top bar menu. Now choose the cropped bitmap with a polygon tool located at the top bar menu of the image section of your Wilcom embroidery software.
-
Make sure that you have chosen the file and use the window paint.
-
Choose the desired area of the picture by drawing with a polygon tool.
-
Make the selection of your image.
-
Once you have selected the desired picture area, hit the enter key to crop the image.
-
The image will automatically crop.
Set Your Appropriate Picture Size
Once you have cropped the image, it is time to set the file size. But do not worry. Changing the file size before digitizing does not mean you can not change the size afterward. But it is a good habit to set the size in the beginning.
-
Change the metric to us. This will help you to set your design size in inches instead of mm.
-
Unlock the lock icon. It will allow you to change the file size separately in height and width. If not then leave it to lock.
Lock The Image Before Converting It To Embroidery
You might be wondering why you need to lock your embroidery artwork. Well, it is good to lock the image as you are done with all the editing work. Locking your image will eliminate the chances of any mistake or any unexpected changes.
Now, you can work on your jpeg file without any trouble as it is locked. Your image will not move until it is unlocked.
-
Press “k” to lock the set the image status to lock.
-
Press “shift+k” to unlock.
-
Make sure to select the image before locking or unlocking. Or else, these command keys will not work.
Other Notable Embroidery Software To Convert Image To Embroidery File
Pulse
Pulse is another embroidery software with which you can convert an image to an embroidery pattern. With Pulse, you can get the right digitized files that you can use in Tajima machines. The price of software depends on the usage and functionality. You can purchase the software from the company's website.
Embird
Embird is another embroidery software. It will also help you to convert images to embroidery patterns with ease. You can get a hands-on free version to check whether it is the right embroidery software for you or not. Plus, Embird also comes in different suites. You can choose one according to your needs.
Wrapping Up
This is all you need to know about how to convert an image to an embroidery file. If you still have any questions about the topic or anything related to custom embroidery digitizing, feel free to reach out to us at Migdigitizing. Moreover, we will provide you high-quality embroidery digitizing services at $1.5/1000 stitches. - $8 minimum for 5000 stitches.


