
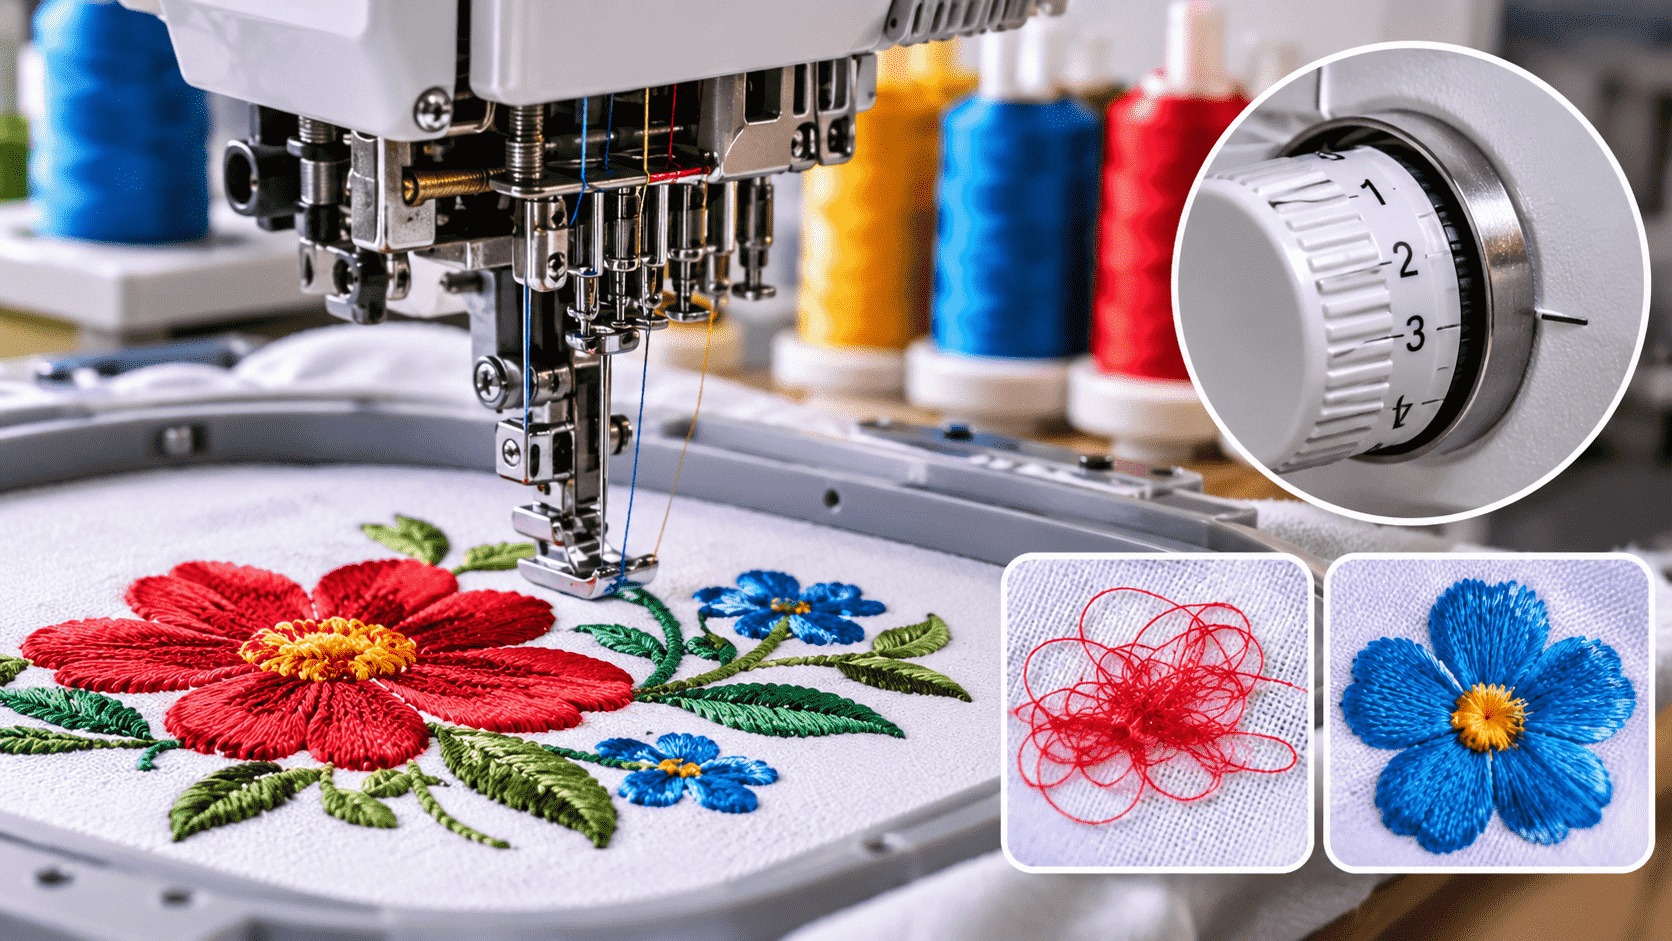
Embroidery machine tension is the resistance controlling how the upper thread and bobbin thread form stitches together. Correct tension produces smooth, secure embroidery without excessive looping, visible bobbin thread on the front, or unnecessary fabric distortion. If stitches look uneven, check threading, needle condition, bobbin installation, stabilizer, and fabric before adjusting the machine's tension settings.
An embroidered logo can look beautiful on a computer screen and still stitch poorly on fabric. Sometimes the problem is the design file. Other times, it is the needle, stabilizer, or thread. But one of the first settings embroidery operators investigate is embroidery machine tension.
Thread tension affects how securely stitches form and how the embroidery looks on the finished garment. When it is properly balanced, satin lettering appears smooth, filled areas remain consistent, and the top and bobbin threads work together without excessive pulling.
When tension is unbalanced, operators may notice thread loops, bobbin thread appearing on the front, irregular stitches, or repeated thread breaks.
The challenge is that these symptoms are not always caused by tension alone.
For example, fabric puckering may result from excessive stitch density or insufficient stabilization. Thread breakage can come from a damaged needle or rough thread path. Adjusting tension without checking these possibilities may create additional problems.
Whether you operate a home embroidery machine or manage commercial embroidery production in the United States, understanding the relationship between thread tension, fabric behavior, and digitizing quality can make troubleshooting more effective.
This guide explains how embroidery tension works, how to inspect stitches, how to make controlled adjustments, and how to identify problems that require a different solution.
Embroidery machine tension refers to the controlled resistance applied to thread while stitches are being formed.
Most computerized embroidery machines use two threads: an upper thread supplied from the spool and a lower thread supplied from the bobbin.
The upper thread passes through guides, tension components, the take-up mechanism, and the needle. The bobbin thread is delivered through the lower thread system.
During stitching, the two threads interlock to secure the embroidery to the fabric.
Tension helps determine how these threads interact.
If the balance is unsuitable, the upper thread may be pulled too far toward the underside or the bobbin thread may appear on the front.
However, tension should not be confused with stitch density. Tension is a machine-thread setting, while density is primarily controlled through the digitized embroidery design.
Both influence the finished result, but they solve different problems.
Understanding the stitch-forming process helps explain why tension adjustments affect embroidery.
Upper tension controls resistance on the thread traveling from the spool to the needle.
Depending on the machine, this may be adjusted through a mechanical dial, individual tension knobs, or an electronic control system.
Higher upper tension generally increases resistance and pulls the upper thread more strongly relative to the bobbin thread.
Lower upper tension reduces resistance.
The correct setting depends on the machine and materials.
Bobbin tension controls resistance as the lower thread leaves the bobbin assembly.
Some machines use a removable bobbin case with a tension spring. Others have different arrangements or factory-calibrated components.
Bobbin settings should be checked according to the manufacturer's instructions.
During stitch formation, the needle carries the upper thread through the fabric, and the hook mechanism catches the thread loop.
The upper thread passes around the bobbin thread, and the take-up mechanism completes the stitch.
Balanced resistance helps the threads interlock consistently.
The aim is not to tighten both threads as much as possible. It is to achieve stable stitch formation without excessive resistance or looseness.
Correct thread tension affects appearance, durability, and production consistency.
Smooth satin stitching: Lettering and borders should have an even appearance without unexpected loops or exposed bobbin thread.
Reliable stitch formation: Balanced thread delivery helps the machine form consistent stitches.
Reduced interruptions: Appropriate tension can reduce tension-related breaks and looping, although other mechanical factors also matter.
Better fabric appearance: Avoiding unnecessary thread pull can help reduce distortion, especially when combined with suitable stabilization.
Consistent repeat orders: Embroidery businesses producing uniforms, promotional merchandise, and custom apparel benefit from repeatable settings and documented production procedures.
For commercial embroidery, a small recurring defect can become expensive when repeated across dozens or hundreds of garments.
That makes preventive testing worthwhile.
One of the easiest ways to assess tension is to inspect a simple satin-column test from both sides.
On the front, the satin stitching should look smooth and consistent.
On the back, a commonly used guideline for conventional satin embroidery is to see bobbin thread occupying roughly the center third, with upper thread visible along the sides.
This is known as the one-third bobbin guideline.
It is a practical reference for certain satin tests, not a universal standard for every stitch type.
If upper tension is too low relative to bobbin resistance, excessive upper thread may appear on the back.
The stitches may also look unstable.
Loose loops on the front can occur, although they may also indicate that the thread was not seated correctly in the tension system.
If upper tension is excessive relative to bobbin resistance, the lower thread may become visible on the front.
The design may also appear unusually tight or narrow.
These symptoms should prompt inspection, not immediate large adjustments.
| Stitch Appearance | Possible Cause | Recommended First Check |
|---|---|---|
| Smooth front, balanced satin-test back | Suitable thread balance | Continue representative testing |
| Excess upper thread on back | Low upper tension or high bobbin resistance | Rethread upper path |
| Bobbin thread visible on front | High upper tension or low bobbin resistance | Check threading and bobbin |
| Loops around stitches | Threading, tension, or thread-delivery issue | Rethread and inspect guides |
| Puckered fabric | Stabilization, density, hooping, or tension | Check fabric and design setup |
| Repeated thread breaks | Needle, friction, threading, or excessive resistance | Replace needle and inspect path |
Thread tension does not operate independently of the rest of the embroidery process.
Polyester, rayon, metallic, and other specialty threads behave differently.
Variations in thickness, finish, and flexibility affect how thread passes through the machine.
Damaged spools or poor-quality thread can create inconsistent resistance.
A bent, blunt, or incorrectly sized needle can interfere with thread movement and stitch formation.
A fresh needle suited to the thread and fabric should be part of routine troubleshooting.
If thread misses a guide or is not seated properly in the tension mechanism, the machine may produce loops or inconsistent stitches.
Rethreading according to the machine manual often resolves issues that initially appear to require tension adjustment.
Stretchy knits, stable woven fabrics, fleece, towels, and structured caps react differently to needle penetration.
Fabric movement can make stitches appear unbalanced even when thread tension is acceptable.
Stabilizer helps control fabric movement during embroidery.
An unsuitable stabilizer can contribute to distortion, shifting, and puckering.
Incorrect bobbin placement, unsuitable bobbin thread, or debris in the bobbin area can affect lower-thread delivery.
Lint, damaged components, and worn tension mechanisms may create inconsistent results.
Follow the machine manufacturer's cleaning and maintenance recommendations.
A reliable tension test helps separate actual thread-balance problems from issues caused by the design or material.
Use the same fabric, stabilizer, thread, and needle intended for the project.
If you are embroidering polyester polo shirts, testing only on stable cotton may not reveal the same behavior.
Check that the upper thread follows the correct path and that the bobbin is installed properly.
Make sure the thread moves freely and is not caught around the spool or a guide.
Use a manufacturer-recommended tension test or a simple satin-column design.
Avoid starting with a complicated logo containing numerous stitch types.
Run the test using appropriate machine settings and a correctly prepared hoop.
Watch for unusual noises, thread breaks, or inconsistent thread delivery.
Look for smooth satin stitches on the front.
Examine the reverse side for the relative distribution of upper and bobbin threads.
Use the one-third bobbin guideline where applicable.
If an adjustment is necessary, change only one setting before repeating the test.
Keep a record of the original setting and the result of each change.
This method makes troubleshooting more systematic and reduces the chance of introducing new problems.
Upper thread tension is generally the first adjustable tension control to evaluate after confirming correct threading and machine setup.
Begin by recording the current setting.
If a satin test shows excessive upper thread on the underside, the upper tension may be too low relative to bobbin resistance.
A small increase may improve the balance.
If bobbin thread appears on the front, the upper tension may be too high relative to bobbin resistance.
A small reduction may be appropriate.
However, do not change settings until you have checked for incorrect threading, damaged thread, or bobbin installation problems.
Different embroidery machines use different adjustment scales. A setting that works on one machine may not work on another.
Always remain within the manufacturer's recommended adjustment procedure.
Bobbin tension provides resistance to the lower thread.
In many embroidery workflows, the bobbin system is intended to remain relatively consistent while operators make routine upper-thread adjustments.
Some commercial embroidery machines use bobbin tension gauges to measure resistance.
Others require specific manufacturer-approved checks.
Before adjusting the bobbin case, inspect the bobbin itself.
Confirm that the thread is wound correctly, the bobbin is installed in the proper direction, and the case is clean.
A damaged bobbin case can cause inconsistent resistance even when the adjustment setting has not changed.
If your machine has an adjustable bobbin-case screw, follow the manufacturer's instructions carefully.
Avoid experimenting with factory-calibrated components or unfamiliar mechanisms.
For commercial operators, maintaining a known-good spare bobbin case can help isolate certain lower-thread problems, provided the spare is compatible and correctly set.
This is often associated with excessive upper tension relative to bobbin resistance.
Check the threading path and bobbin installation first.
If those are correct, test a small upper-tension reduction according to the machine manual.
This can indicate insufficient upper tension or incorrect threading.
Rethread the machine and confirm that the thread is properly seated in the tension mechanism.
Then perform a simple satin test.
Repeated thread breaks may be caused by excessive resistance, a damaged needle, poor thread quality, or rough machine components.
Replace the needle and inspect the thread path before making major adjustments.
If the problem continues across multiple threads and designs, maintenance may be necessary.
Puckering may be related to thread tension, but it frequently involves fabric movement, stabilizer selection, hooping, or dense digitizing.
Use a suitable stabilizer and test a simpler design.
If the simple test looks good but the original design puckers, inspect the digitizing.
Uneven lettering may result from inconsistent thread delivery, poor pull compensation, or unsuitable stitch direction.
Compare the result with a basic satin-column test.
If the basic test is clean, the original design may require digitizing adjustments.
The same embroidery file and machine settings may behave differently across materials.
| Fabric or Product | Main Challenge | Practical Approach |
|---|---|---|
| Cotton Shirts | Lightweight fabric distortion | Suitable stabilizer and balanced stitching |
| Polyester Polos | Stretch and movement | Stable hooping and appropriate cutaway support |
| Fleece | Stitches sinking into pile | Suitable underlay and topping when needed |
| Towels | Raised loops obscuring details | Water-soluble topping and appropriate digitizing |
| Denim Jackets | Thick layers and larger designs | Suitable needle and balanced stitch distribution |
| Caps | Curved structure and restricted area | Cap-specific hooping and stitch planning |
Stable woven cotton is often straightforward to embroider, but lightweight materials can still distort under dense stitching.
Use suitable stabilization and avoid unnecessary adjustments when the real issue is fabric support.
Stretchy performance shirts require careful handling.
Cutaway stabilizer is often helpful for maintaining shape.
Avoid overly dense embroidery that creates stiffness or pulls the garment.
Raised fibers can interfere with the visibility of embroidery.
A suitable topping may help keep stitches above the surface.
Increasing tension is not a reliable substitute for appropriate digitizing and stabilization.
Caps require attention to the curved embroidery surface and available sewing field.
Specialized cap digitizing may help maintain registration and reduce production difficulties.
Test the design using the actual cap construction whenever possible.
One of the most overlooked causes of poor embroidery is the design file itself.
A machine can have acceptable thread tension and still produce distorted stitches when the digitizing is unsuitable.
Closely packed stitches increase thread buildup and repeated needle penetrations.
This can create stiffness, friction, and fabric distortion.
An operator may try to fix the problem by changing machine tension, even though the file requires correction.
Underlay supports visible stitches and helps stabilize fabric.
Too little underlay can allow shapes to distort.
Too much can create unnecessary thread buildup.
An inefficient sequence may cause excessive travel, repeated overlapping, or avoidable trims.
These problems can affect production efficiency and appearance.
Thread can pull fabric inward during stitching.
Appropriate pull compensation helps preserve the intended dimensions of lettering and shapes.
Wide satin columns, tiny lettering, and complicated fills may require design modifications.
Selecting a suitable stitch structure can improve reliability without changing the machine's tension.
Migdigitizing offers professional embroidery digitizing services for business logos, caps, jacket backs, appliqué, and custom embroidery projects. Carefully prepared stitch files can help reduce design-related production issues, although machine maintenance and test stitching remain essential.
Good embroidery production depends on repeatable habits.
Start every new project with clear artwork and accurate production specifications.
Choose a needle suited to the thread and fabric. Replace it when damaged or worn.
Use compatible bobbins and good-quality embroidery thread.
Maintain the machine according to its service schedule.
Before making tension changes, confirm that the upper thread and bobbin are installed correctly.
For unfamiliar materials or complicated designs, run a sample before beginning full production.
Document successful combinations of thread, fabric, stabilizer, needle, and machine settings.
This is particularly useful for embroidery shops handling repeat uniform orders, branded workwear, and promotional merchandise.
A successful sample can become a valuable reference for future production.
Routine threading, needle replacement, and basic cleaning are generally operator-level tasks.
However, some problems require professional inspection.
If the machine repeatedly breaks thread despite correct threading and a new needle, investigate whether a mechanical issue is present.
Unusual noises, damaged tension components, inconsistent hook operation, or recurring stitch-formation failures may require servicing.
Do not attempt internal timing adjustments or unfamiliar repairs without appropriate training.
A qualified technician can inspect components that are beyond normal user maintenance.
This is especially important for commercial embroidery equipment where incorrect repairs may lead to additional damage or production downtime.
There is no single best setting for every machine. The correct tension depends on the model, upper thread, bobbin thread, needle, fabric, and stabilizer. A manufacturer-recommended test pattern is more useful than copying another machine's tension number.
Possible signs include bobbin thread appearing on the front of satin stitches, unusually tight stitch formation, or thread breakage. However, these symptoms can also have other causes.
Excess upper thread on the underside can indicate insufficient upper tension or incorrect threading. Rethread the machine before making adjustments.
Yes, but puckering may also be caused by excessive stitch density, inadequate stabilization, poor hooping, or fabric movement.
After confirming the machine is correctly threaded, upper tension is generally the first adjustable control to evaluate. Follow the manufacturer's instructions before changing bobbin tension.
Yes. Excessive density, unsuitable stitch types, and poor sequencing can produce problems that resemble tension issues. Test a simple, known-good design to help distinguish machine problems from file problems.
Different fabrics vary in thickness, stretch, stability, and surface texture. These characteristics affect stitch formation and appearance, so stabilization and digitizing may need adjustments.
Check stitch quality when changing thread types, bobbins, needles, fabrics, or other important production conditions. Regular testing is also useful when a machine begins producing inconsistent results.
Understanding embroidery machine tension is an essential part of producing clean, professional embroidery.
However, successful troubleshooting requires more than changing a dial.
Upper thread resistance, bobbin tension, needle condition, stabilizer, fabric behavior, and digitizing quality all influence the finished result.
Oct 30 , 2026 at 09:32:40

Oct 30 , 2026 at 06:50:39

Nov 16 , 2026 at 06:48:15